
World of Warcraft Season of Discovery Phase 2 has introduced a new 10-man Gnomeregan Raid for players to conquer to get some great gear.
In a similar fashion to Blackfathom Deeps 10-man Raid during Phase 1, Gnomeregan has been adjusted to give players a challenge and opportunity to try out the newfound strength from the new runes.
Since the difficulty has been amped up, we will go over some tips and tricks for you to have an easier time clearing the Raid and defeating each boss. We will make sure to update the article if new information has been found by the players.
WoW SoD Gnomeregan Raid Bosses
Advertisement
WoW SoD Gnomeregan Grubbis

One thing to note is that there are green gas clouds slowly moving towards players. Make sure not to get hit and drag Trogg adds into it to as they explode and the gas clouds disappear.
While there is an active gas cloud, the entire raid will receive a pulsing AoE Nature damage. Make sure to have several Nature Protection Potion handy.
The Off-Tank should hold his basilisk pet Chomper while DPS target down Grubbis. Keep in mind that more gas clouds will spawn the longer the fight goes on so you will need to burst down Grubbis.
If a gas cloud reaches Grubbis, he will enrage and deal a lot of damage. At 20% HP, the boss enrages by default so be on the lookout. Once Grubbis goes down, you will also have to kill Chomper.
-
Radiation? - This is a backwards frontal cone damage ability which both does damage and knocks back if hit.
-
Trogg Rage - This is a enrage ability that makes Grubbis do extra physical damage.
-
Grubbis Mad! - This is a AoE spell that does damage to everyone regardless of range, it doesn't hit for a lot but but can finish people off if healing is lacking.
-
Petrify - Chomper will sometimes cast this on the tank that's tanking him, causing him to get stuned for 8 seconds, this can be dispelled.
Advertisement
WoW SoD Phase 2 Grubbis Tips
We will be covering tips for all roles in the Gnomeregan Raid during the first boss encounter.
Tank Tips
-
Assign main and off-tank roles accordingly to avoid any mishaps as Chomper randomly de-aggros and targets a random player so you will need to have a taunt ready at all times.
Melee Tips
- Pay attention to when the boss casts Radiation? to keep DPSing without being interrupted.
Ranged Tips
-
DPS as normal and make sure to keep your distance from the tank and the trogg adds so they can be safely kited to gas clouds.
Healer Tips
-
Conserve as much mana as possible due to the constant ticking Nature damage.
-
Be ready to top up the tank once Grubbis becomes enraged.
-
Keep everyone healthy as there might be a sudden death when the Nature damage is combined with Grubbis Mad!
Advertisement
WoW SoD Gnomeregan Viscous Fallout

You will have to kite the boss around the room so make sure to clear out all of the adds beforehand.
-
Sludge - Spawns a pool of toxic slime that inflicts 150 Nature damage every 1.5 seconds and slows players by 50%.
It might be difficult to see this but just make sure to constantly kite the boss away from the pools.
-
Summon Irradiated Goo - Summons 3 Irradiated Goo.
You will have to keep the boss away from small bindings on the ground that are called Desiccated Fallout. If the 3 summoned Irradiated Goo reach the bindings a Desiccated Fallout will spawn you will have to kill. It has the Radiation Burn ability that needs to be kicked.
Advertisement
WoW SoD Phase 2 Viscous Fallout Tips
We will be covering tips for all roles in the Gnomeregan Raid during the second boss encounter.
Tank Tips
-
Make sure to kite the boss away from the pools and bindings on the ground so that melee DPS can keep uptime on the boss.
Melee Tips
- Make sure to focus the three Irradiated Goo ASAP to prevent an add spawn.
- Should a Desiccated Fallout, make sure to save your kick for Radiation Burn
Ranged Tips
-
If you are not assigned to a Static Arc soaking group make sure to stay in melee range as close as possible to not cause any mishaps when ranged groups are switching place.
- Save your instant casts when you have to swap places or when the boss forces you to spread out.
Healer Tips
- Keep the tank topped up and look out for raid-wide healing due to Sludge.
-
If Desiccated Fallout manages to cast Radiation Burn, be prepared to heal the entire raid.
Advertisement
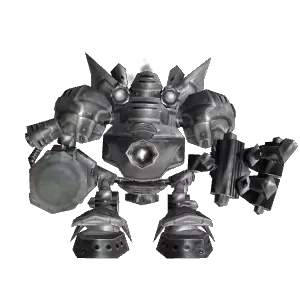
WoW SoD Gnomeregan Crowd Pummeler 9-60

This boss will require a lot of personal responsibility as you will need to avoid the gears on the ground.
-
Gnomeregan Smash - Frontal spell that targets a player and if not dodged will knock the player off the platform and kill him.
You can identify the direction of the spell by looking at the feet of the boss. They will point in the direction of the frontal so pay attention to your surroundings and to the boss as well.
-
Gear Toss - Throws out two gears onto the floor which move linearly and knock players back if hit. You can be knocked off the platform so avoid them at all times.
As you continue to damage the boss, he will spawn two additional gears on the floor so make sure to watch out for them.
-
The Claw! - Targets a player and charges them doing a lot of damage and grabbing them.
Once the boss reached 30% HP, he will begin casting this spell so make sure to top up the targeted player or you can even avoid the charge by either using Blink, using Ice Block, Vanish or any other utility your class may have.
Advertisement
WoW SoD Phase 2 Crowd Pummeler 9-60 Tips
We will be covering tips for all roles in the Gnomeregan Raid during the third boss encounter.
Tank Tips
-
Make sure to keep the boss in the center so that the other players have enough space to avoid gears and the frontal spell.
-
Free Action Potion can be used to avoid the knock-back from the Gear Toss gears.
Melee Tips
-
Melee damage dealers should avoid the gears from Gear Toss in order to have high uptime.
-
Paladins can use Blessing of Protection on the player targeted by The Claw! as to make them immune to it.
-
Paladins can use Blessing of Freedom on themselves or other players as to avoid moving out of the gears from Gear Toss.
- Free Action Potion can be used to avoid the knock-back from the Gear Toss gears.
Ranged Tips
-
Ranged damage dealers should spread around as much as possible in order to avoid moving due to the Gnomeregan Smash frontal projectile.
-
Optimize your instant casts when you are forced to move to avoid the gears.
- Free Action Potion can be used to avoid the knock-back from the Gear Toss gears.
Healer Tips
- Pay attention to players getting caught in The Claw! as you will need to keep them topped off a lot.
-
Free Action Potion can be used to avoid the knock-back from the Gear Toss gears.
Advertisement
WoW SoD Gnomeregan Electrocutioner 6000

We will go through all of the abilities of the boss so you can have a better understanding of what to expect from the encounter. Essentially, the boss will cast Positive and Negative charges on the raid members.
Once a player has a Negative charge Magnetic Pulse they should run away from the rest of the group to avoid dealing unnecessary damage to other players. If a tank has a Negative charge, simply stand away from him.
-
Discombobulation Protocol - AoE spell that deals damage and knocks players back.
-
Magnetic Pulse - Targets a player with a debuff that changes their pollarity, this causes the player to inflict AoE damage around them and pull in players within 8 yards.
-
Static Arc - Discharges a chain lighting-like ability that hits 3 targets, and applies a 20 sec debuff that increases damage from Static Arc by 500%.
This is the most important mechanic to look after as this targets the players furthest away from the boss.
Your raid will need to have two separate ranged groups consisting of three players that will need to constantly swap places once one group has been hit by Static Arc.
If a ranged group has been hit by a Negative charge Magnetic Pulse then someone will need to swap places to soak the debuff.
Advertisement
WoW SoD Phase 2 Electrocutioner 6000 Tips
We will be covering tips for all roles in the Gnomeregan Raid during the fourth boss encounter.
Tank Tips
- This is a straightforward tank and spank so you will not have to do much.
-
Make sure to keep the boss against the wall so that the other players have enough space to run out of range when a negative charge has been cast.
Melee Tips
- Constantly be aware Static Arc and Magnetic Pulse while trying to keep uptime on DPS.
- Save gap closers for when the boss casts Discombobulation Protocol every 30 seconds or so.
Ranged Tips
-
If you are not assigned to a Static Arc soaking group make sure to stay in melee range as close as possible to not cause any mishaps when ranged groups are switching place.
- Save your instant casts when you have to swap places or when the boss forces you to spread out.
Healer Tips
- Save your instant heals and utility when you are forced to move to maximize your downtime.
-
Keep an eye out for Magnetic Pulse and make sure to notify the other healer so they can keep the tank topped off.
Advertisement
WoW SoD Gnomeregan Mechanical Menagerie (New Boss)

This is the fifth boss in the Gnomeregan Raid. An important thing to note is that once you have sucessfully killed all of the Mechanical Beasts, the final boss will almost instantly spawn so immediately back away from the center of the room.
You must also be aware that you will need to kill all 4 of the bosses at the same time before they have to chance to repair themselves by casting Self Repair that heals them for 31% of their total health.
You can also take advantage of the buttons placed on all of the pillars as they act a a in-raid Life Tap where you take some damage to get a lot of mana in return once you press a button.
WoW SoD Phase 2 Mechanical Menagerie Primary Abilities
We will go through all of the abilities the 4 different mechanical beasts have so you can know what to expect from the encounter.
STX-37/CN Chicken Abilities

-
Explosive Egg - Drops an explosive egg that explodes for AoE damage.
-
Cluck! - Buffs its own and its allies attack speed by 50%.
The main tank should hold both the Chicken and Squirrel mobs.
Make sure to burst down the explosive eggs ASAP as the Squirrel mob already deals some AoE damage.
Save your cooldowns when the Chicken boss uses the Cluck! buff.
Advertisement
STX-25/NB Squirrel Abilities

- Widget Volley - Targets a player, interrupts them and deals some damage./
li] -
Widget Fortress - Throws down an AoE effect which if stood on by any of the four bosses provides them a large damage reduction buff.
The main tank should hold both the Chicken and Squirrel mobs.
STX-13/LL Sheep Abilities

-
Frayed Wiring - Buff similar to Thorns which damages attacking enemies. Can be applied to any of the four bosses.
-
Binary Bleat - AoE spell with 8 yard range that will silence everyone for 10 seconds.
-
Static Fleece - Periodically triggers a stun on the player if melee hit.
Make sure to kite the Sheep at all times as ranged DPS need to focus it since the AoE melee stun will set back melee DPS players.
STX-04/BD Whelp Abilities
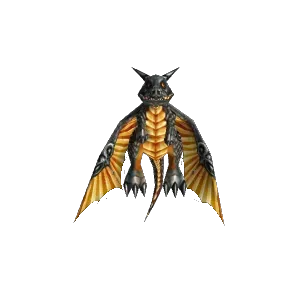
-
Sprocketfire Breath - Frontal fire breath that deals damage.
-
Overheat - Buff applied to any of the bosses, deals AoE damage to everyone within 15 yards of it, but increases damage taken by 25%.
An Off-Tank should take the Whelp mob and once the Whelp uses its frontal fire breath, you can kite another boss to it so it takes the damage as well.
Advertisement
WoW SoD Phase 2 Mechanical Menagerie Tips
We will be covering tips for all roles in the Gnomeregan Raid during the penultimate boss encounter.
Tank Tips
- You can kite the bosses by using the octagon around the room as a path to move the bosses around to allow casters to stay in the center and for melees to keep damaging.
-
Make sure to kite the bosses away from Widget Fortress as soon as possible.
Melee Tips
-
Avoid hitting the Sheep mob at all times due to its periodic stun.
-
Pay attention which boss has the Frayed Wiring buff to avoid unnecessary damage.
-
Make sure to swap to to whichever boss gets buffed with Overheat for higher single target damage.
Ranged Tips
-
Stay in the center of the room to deal as much as damage as possible.
-
Make sure to swap to to whichever boss gets buffed with Overheat for higher single target damage.
-
If you have any dot abilities, make sure to spread them between all 4 targets for most value since they all need to die at same time regardless.
Healer Tips
-
Stay in the center of the room to be able to consistently heal players without having to move.
-
Try to pay attention when the chicken casts Cluck! as that will prompt you to be able to top up more players.
-
Save your AoE healing for DPS when Overheat is cast on a boss.
Advertisement
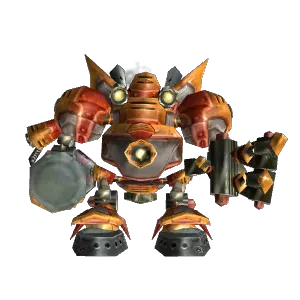
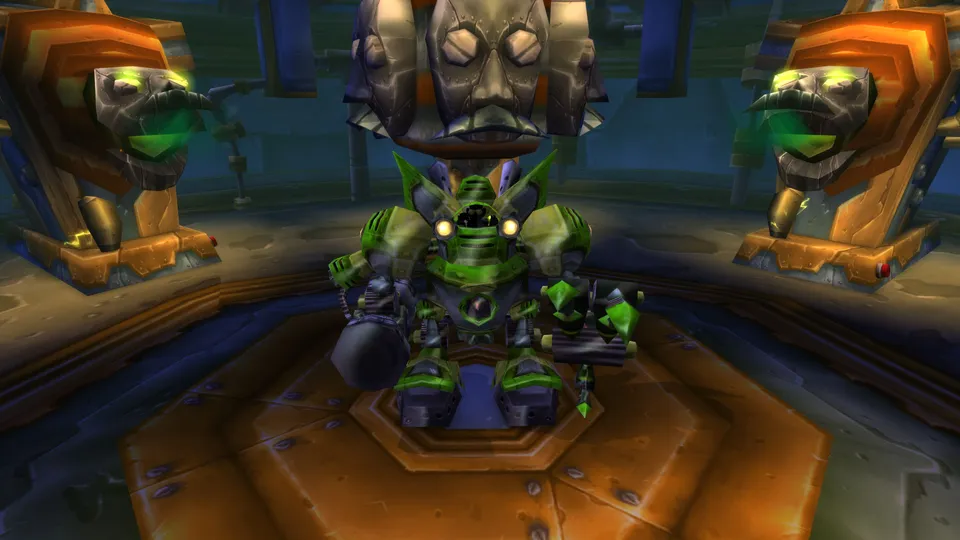
WoW SoD Gnomeregan STX-96/FR | Mekgineer Thermaplugg

This is the sixth and last boss of the Gnomeregan Raid as you will need to go through several phases to defeat him. We will go through all of the different ablities during all of the phases so you can have a better understanding of the fight and you should do.
WoW SoD Phase 2 Mekgineer Thermaplugg Primary Abilities
Each of the phases has a different set of bombs that they drop. The first (Fire) phase, the second (Frost) phase and third (Nature) phase.
-
Incendiary Bomb - Drops while STX-96/
FR is active, when these explode they do relatively high damage as well as leave a ground fire effect that deals damage. -
Frost Bomb - Drops while STX-97/
IC is active, when these explode they do relatively high damage as well as leave a ground that slows players. -
Radioactive Bomb - Drops while STX-98/
PO is active, when these explode they do relatively high damage as well as leave a ground that applies a disease which increases nature damage taken by 50%.
The bombs spawn from one of the pillars in the room, and players can stop them from spawning by clicking on red buttons that are located on the right side of the pillars.
Please keep in mind that a debuff is applied to a player once you click a button that stops you from clicking another pillar button for 30 seconds.
This should be prioritized by ranged DPS players as melees will lose a lot of uptime running to the buttons and back to the boss but they should also be reserved as backup.
Clicking a button also takes some health away but grants mana so both ranged DPS and healers can make use of this to get some mana back.
Advertisement
STX-96/FR First (Fire) Phase Abilities and Tips
 The first phase deals a lot of Fire damage so you can prep for it by chugging a Fire Protection Potion. The phase will last until the boss reaches 50% HP.
-
Sprocketfire - This is a stacking dot damage that gets applied to the tank, creating a forced tank swap during the boss.
-
Sprocketfire Punch - Does some damage to its current target applies Sprocketfire, eventually forcing a tank swap to mitigate damage taken.
-
Furnace Surge - The boss will cast a frontal fire breath-like spell, if hit will apply repeated stacks of the Sprocketfire debuff.
During the first phase, the fire boss will be stacking Sprocketfire on the tank, via either Sprocketfire Punch, Furnace Surge, and Incendiary Bomb; and on the raid through the latter two.
Furnace Surge can be avoided entirely even by the tank by running directly away from the boss while it does its frontal. Between 5 and 7 stacks, the off-tank should taunt and pick up the boss until the main tank's Sprocketfire runs out.
Advertisement
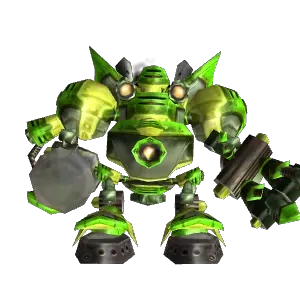
STX-97/IC Second (Frost) Phase Abilities and Tips
 Phase WoW SoD Phase 2")
The second phase deals a lot of Nature damage so you can prep for it by chugging a Frost Protection Potion. The phase will last until the boss reaches 50% HP.
-
Supercooled Smash - Does some damage to its current target applies Freezing, at 10 stacks, it applies Frozen Solid, which can force a tank swap.
-
Coolant Discharge - Casts a raid-wide AoE damage ability, this also applies Freezing. If a target is Frozen Solid, it wipes the raid instead.
-
Freezing - The debuff caused by the previous two spells, this is a stacking slow that eventually causes the target to become Frozen Solid. This is a dispellable debuff.
During the second phase, the frost boss will be stacking Freezing on the raid, via Coolant Discharge, and Frost Bomb; and on the tank, via Supercooled Smash.
This debuff can be dispelled, meaning one tank can handle the boss the entire phase without worrying about getting Frozen Solid.
Make sure to keep the tank and the raid below 9 stacks, because during the 10th, it will freeze the target, and when Coolant Discharge is cast, it'll causes a raid-wipe.
Advertisement
STX-98/PO Third (Nature) Phase Abilities and Tips
 The third phase deals a lot of Frost damage so you can prep for it by chugging a Frost Nature Protection Potion. The phase will last until the boss reaches 50% HP.
-
Radiation Sickness - Stacking debuff that increases the nature damage taken by 50%.
-
Hazardous Hammer - Does some damage to its current and applies Radiation Sickness.
-
Toxic Ventilation - Interruptible AoE channel ability that deals nature damage.
During the third phase, the nature boss will be stacking Radiation Sickness on the raid via Radioactive Bomb; and on the tank through Hazardous Hammer.
These stacks should be either dispelled, or at least kept low. Otherwise, when the Toxic Ventilation gets casted, it'll have massive AoE damage.
Toxic Ventilation can be interrupted, but the lack of a cast bar can make it more challenging than normal - so those with kicks should pay close attention.
Advertisement
STX-99/XD Final Phase Abilities and Tips
 The final phase allows the boss to cast all of the abilities from previous phases, however, you will be able to deal with each one much easier since the boss will be randomizing the spells.
You will need to look out for the bombs at all times and pay attention to your surroundings but you should be able to deal with this phase without stressing too much.
Once you have defeated the mech, Mekgineer Thermaplugg will jump out, but he does not pose a serious threat so you will be able to defeat him quite easily.
Advertisement
WoW SoD Phase 2 Mekgineer Thermaplugg Tips
We will be covering tips for all roles in the Gnomeregan Raid during the final boss encounter.
Tank Tips
-
Kite the boss near the entrance to make it easier to avoid damaging other people with Furnace Surge, as well as allowing you to run away from it further as to avoid the extra Sprocketfire stacks.
-
Ensuring the boss remains around the center during the rest of the fight is important so players can reach pillars faster and keep DPSing.
-
If a bomb explodes, make sure to kite the boss away from the pool the bomb spawns.
Melee Tips
-
Stay out of the floor pools (fire).
-
You should prioritize dealing damage and make sure to act as backup for bombs in crucial situations.
-
If a Frost Bomb does explode, melee can use Free Action Potion to avoid getting slowed and maintain constant DPS.
Ranged Tips
-
If you are assigned to a pillar, make sure to stick next to it to stop bombs as soon as possible.
-
Save instant cast spells for bombs to nuke them down.
-
Target bombs before they reach melees and tanks.
-
Use up mana regeneration potions and cooldowns as the fight is very long.
Healer Tips
-
Your main priority will be to heal if you are not assigned to a pillar. Make sure to stay away from bombs.
-
Using any and all mana regeneration tools (such as mana potions, Minor Recombobulator, Miniaturized Combustion Chamber) as early as possible in order to be able to get more off later and throughout the fight is important, since this is a long fight.
Advertisement


